Why All Traditional Knife Enthusiasts Should Attend the Great Eastern Cutlery Rendezvous

Every year Great Eastern Cutlery holds their Rendezvous at their factory in historic Titusville Pennsylvania. It is a 3 day gathering for fans of GEC to come together and show and tell their traditional knives (it’s not restricted to GEC, other brands’/companies’ knives are very welcome). There’s also a picnic on Saturday where GEC collectors and employees get together to eat and enjoy the company of fellow knife enthusiasts. You can find more information by following this link to Great Eastern Cutlery’s page for this year’s (2019) Rendezvous!

A fine example of a GEC, a #53 Cuban Stockman, in its native territory of Western Pennsylvania

You get to see behind the curtain!

One of the best things about the Rendezvous is getting to see how all the knives are made. Throughout the weekend tours are given by none other than GEC President Bill Howard and his son Will. First off, the fact that the owner himself gives tours is a great look into the culture and workings of GEC. Bill Howard is a man who knows and cares about his products, machinery, and his employees. Second, it’s an incredible opportunity to see every step of the process (except bone dyeing and jigging, which is proprietary and not shown to the public) that goes into making a GEC knife. Let me tell you, it’s impressive to see just how much hand work goes into these knives. Third, it’s a chance to ask any of the questions you have about their production process. I know I’ve had many questions, and they seem happy to answer them. If you want a sneak preview of the tour you can check out a video tour below. It’s a great resource, but it’s not quite as good as in person!

Part 1, you’ll have to go to YouTube for parts 2 and 3

The people are great!

Meeting and conversing with the GEC employees and other Rendezvous attendees is definitely the highlight of the experience. Being that GEC is the most highly respected and sought after production knife maker in America today, the Rendezvous brings together a large and varied group of knife enthusiasts. Over the years that I’ve attended it has grown significantly. There is still the core group of hardcore knife collectors. These are the people who are basically walking encyclopedias of traditional knives, and it’s a treasure to get to discuss the history and nuances of all their knives. There are also now tables set up for people to display their collections and / or knives for sale. For example, last year the owners of the Maher & Grosh set up an extremely interesting display of vintage knives of that brand and also sold some GEC made M&G brand knives. As mentioned earlier, it’s also enlightening to get to know the people who make up GEC. Of course the knives are what makes us so enamored with GEC, but it’s certainly nice to get to meet the people behind the knives and see that they are (in many cases) as excited about what they’re doing as we are.

The #78 American Jack in Glitter Gold in the center is a 1 of 8 parts knife from the 2018 Rendezvous

Titusville has more to do than you think!

I often see people wondering what, if anything, else there is to do in Titusville. After all, it’s not your usual vacation location. I think the tendency is for people to assume there’s nothing to do, but that’s very much not the case! There is the annual Titusville Oil Festival. It is a celebration of the anniversary of the first oil well in the U.S. which was drilled in Titusville, and you can find more information at this link. There is also a craft brewery called the Blue Canoe that has classic food and good drinks, made right there on site. Speaking of the history of oil in Titusville, the site of the first oil well has a very interesting museum. It is called the Drake Well, and you can find more information about the museum at this link. I was always told by my dad, an avid fan of local history and himself in the natural resources industry, that the Drake Well was the first well drilled for oil in the world (and certainly some history books confirm this), but I’ve also read that oil wells were drilled earlier in China. Either way, it’s worth a visit if you’re interested in history. Another place well worth visiting, right next to the Drake Well, is Oil Creek State Park. Oil Creek State Park is a nice little park with some interpretive trails, hiking/biking, and some nice scenery. You can find a list of some good things to do at the park at this link. If you wanted to make a serious knife and history trip out of it, you could go to nearby Tidioute (where natural gas was found, and helped create the history of cutlery in the region) or relatively close by Bradford, where you can visit Case’s factory. Finally, there’s going to be a knife show the same weekend held as a replacement for the Queen show (that was always held on the same weekend as the Rendezvous). I know about this show because it’s being organized by a member of the Allegheny Mountain Knife Collectors Association, but I can’t find a website for it so I can’t provide much more information, though I’m sure once you’re at the Rendezvous it’ll be easy to find more info.

Retouched photograph of the Drake Well, from WikiPedia Media Commons

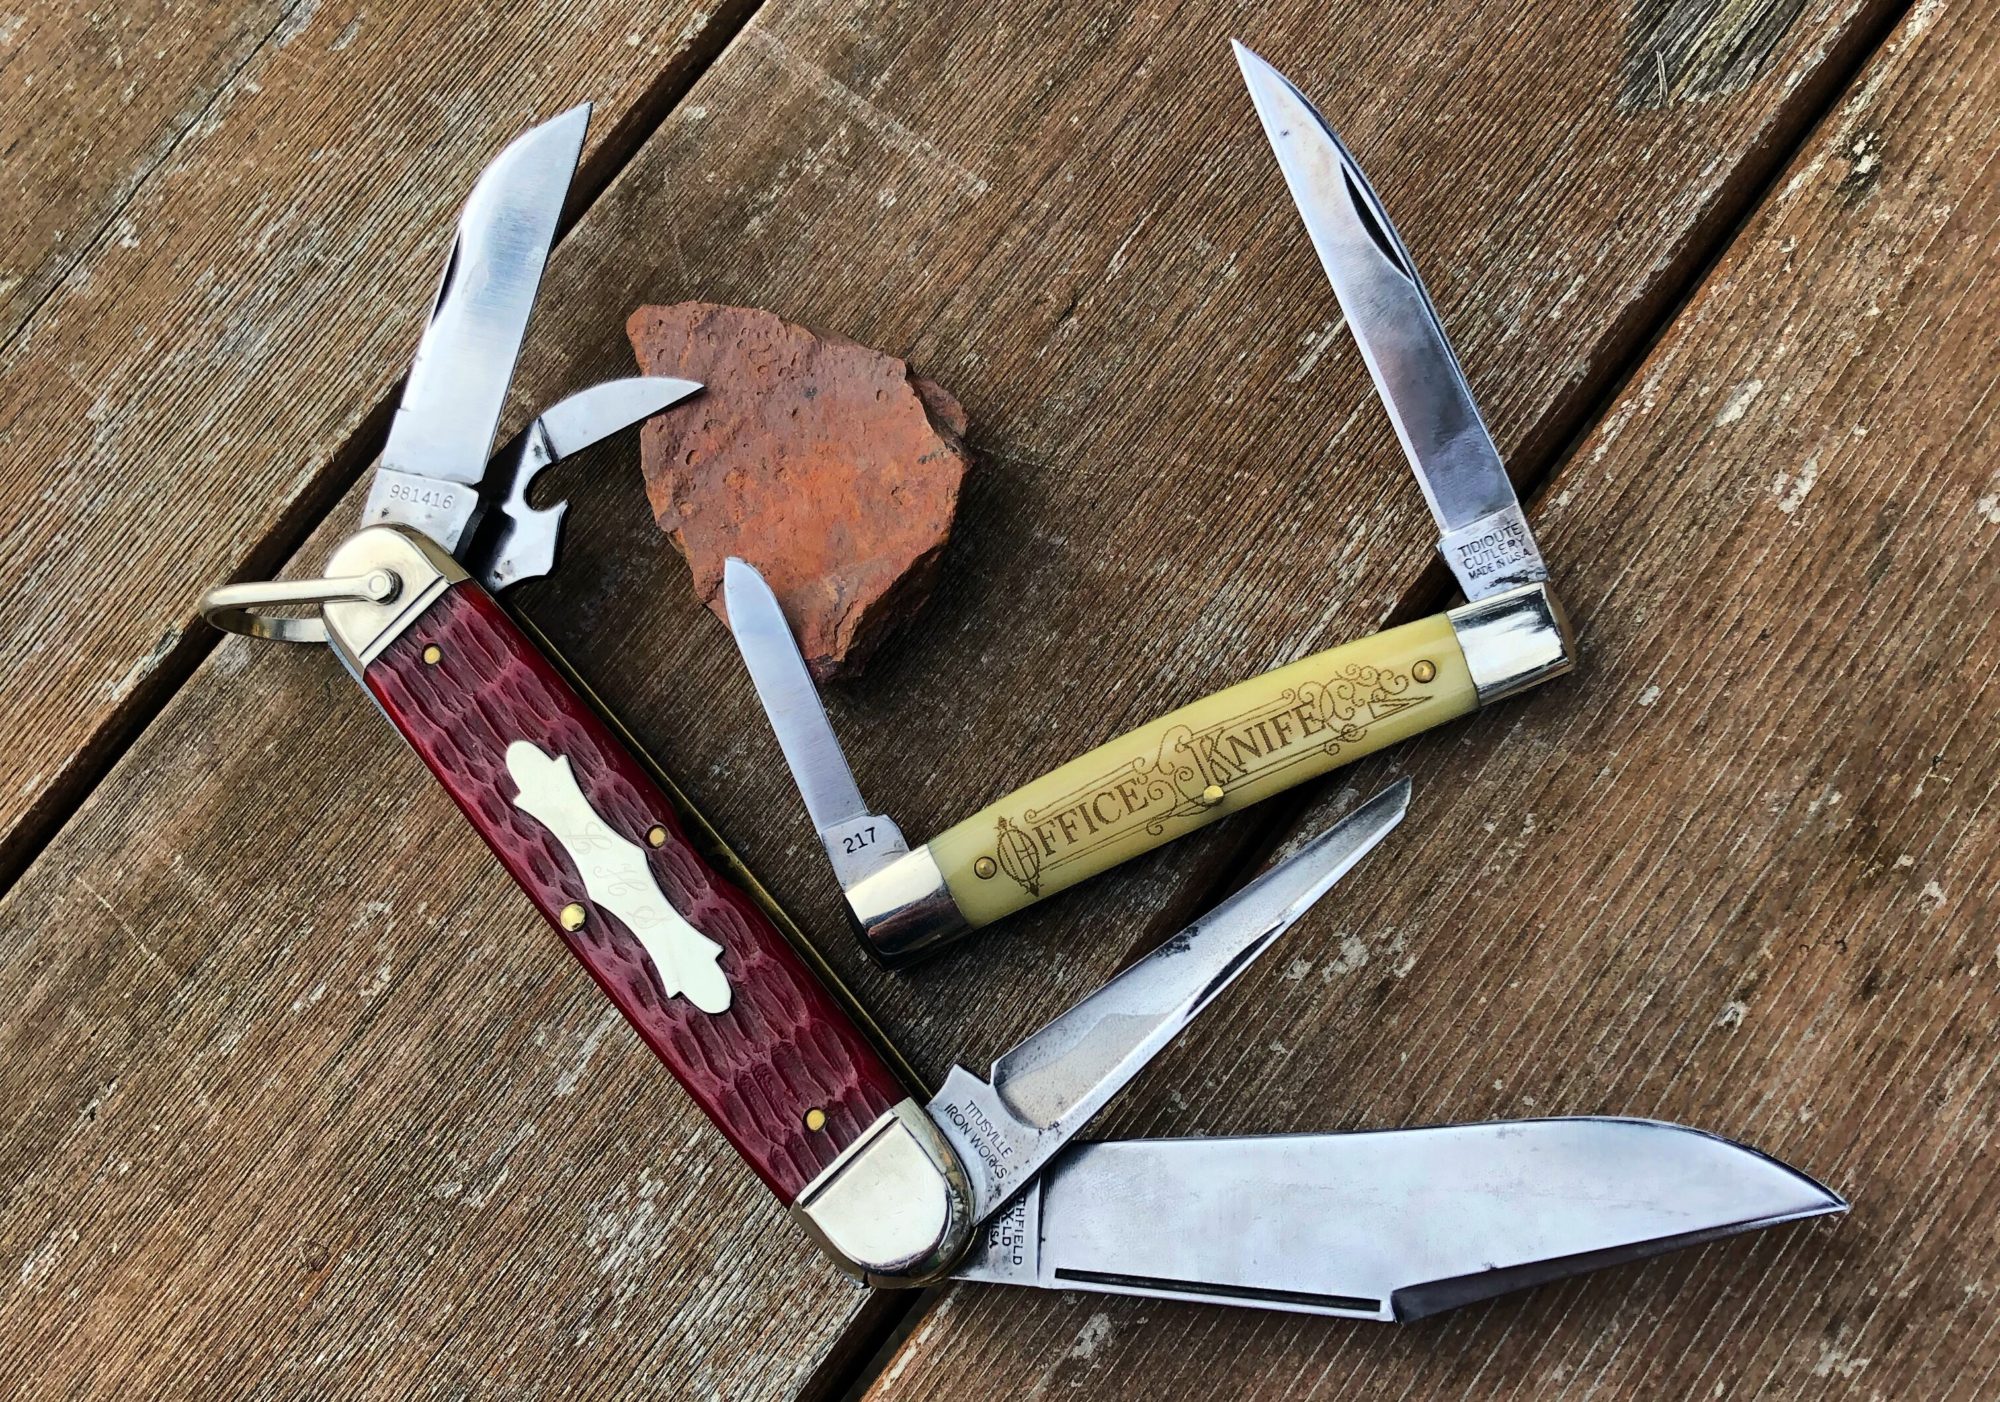
There’s some SUPER cool knives to be had!

Last, but not least, GEC makes some really unique and interesting knives for the Rendezvous. To start, they make a very limited run of “Rendezvous Special” knives. These are the knives made to commemorate that year’s Rendezvous. They make a fixed number, 50 the last couple years, and sell a fixed portion of that each day. You have to get there early to get one, but Friday and especially Saturday seem to be less busy than Thursday. They also make parts knives, knives put together with parts left over from previous runs. These parts knives often have unique handle materials that differ from those used in the normal run. They also often are made in even lower numbers than the Rendezvous Specials, so they’re quite desirable to collectors. Last year GEC only allowed each person to purchase 1 parts knife, and I have heard that they plans to restrict each household to 1 Rendezvous Special and 1 parts knife this year, but that hasn’t been confirmed. Either way, they do a good job of keeping it fun and fair. I’ve been happy to collect the Rendezvous Specials from all the years I’ve attended.

The Rendezvous Specials from the last 5 years

So, will you be there?

I have attended the last 5 Rendezvous, since 2014, and I’m more excited for this one than any other! I hope to see lots of new faces and get to know lots of new people. I have created a facebook group for those planning to attend. You can find the group and request to join by following this link, just make sure to answer the questions. Hope to see you in Titusville!

This year’s Rendezvous is August 8th, 9th, and 10th. It’s at the Great Eastern Cutlery factory at:

Great Eastern Cutlery Factory

Caldwell Street

Titusville, PA 16354

The 3 Keys to Freehand Sharpening

First off, I want to start by saying that I don’t consider myself to be an expert in sharpening. I am on the same journey of sharpening skill progression as anyone reading this, and certainly haven’t reached anything resembling a peak. However, I do have a lot of experience sharpening knives. I have sharpened using powered belt systems, fixed angle systems, pull through (gasp!), and stones. Although I think they all have relative merits, except pull through systems (just kidding, they’re simple and convenient and work for some people), I have found freehand sharpening to be the most rewarding. In this article I will tell you what I think are the 3 most integral keys to successful freehand sharpening.

Angle

The angle at which you sharpen the blade has a huge impact on how it sharpens. This might seem self explanatory; the edge is really just the intersection of two planes at an angle and that angle is what allows the blade to separate material. However, I think it is very easy to overlook this aspect of sharpening and make the angle too obtuse or too acute.

Now, I’m not here to tell you what the correct angle is to sharpen your knife. I usually shoot for something between 15 and 25 degrees per side, or 30 and 50 degrees inclusive. That is when and after I have reprofiled an edge, which means to put a whole new angle on. I don’t think most people want to do that as frequently as I do, so it’s more relevant to talk about sharpening from the factory edge.

When resharpening the factory edge, you should try to match the angle from the maker (unless it is terribly thick). A good way to make sure that you’re succeeding in matching the angle is to paint the edge with a permanent marker before you sharpen. After your first swipe on the stone, check to see that the marker was removed across the entire width of the edge. That will indicate that you have matched the preset angle. This technique is simple but invaluable.

Whether you reapex the edge or match the preset angle, it’s important to find the right angle to sharpen. If you sharpen an edge at too low an angle it either won’t actually create a new edge/apex or it will be too fragile, and if you sharpen an edge at too high an angle it will be too thick to cut effectively. Make sure to always start your freehand sharpening by mindfully setting your intended angle.

Pressure

The level of pressure applied is the next of the most important aspects of freehand sharpening. There are two main reasons why it’s easy to put too much pressure into the stone with the blade when sharpening. First, the more pressure you apply the quicker the stone removes metal. This creates the illusion that you will complete the sharpening quicker, when in reality it will create a stubborn burr and extend the overall time cost of the sharpening. It’s a manifestation of our ubiquitous desire for quick fixes, if you want to get all psychological about it. Second, the more pressure you apply the more stable and controlled the blade can feel. When you apply more pressure it seems to hold the blade more securely at the angle, and considering how important that is as discussed above, it can make us focus on the angle at the expense of the pressure.

So why is too much pressure bad? When you apply too much pressure it does two main undesirable things to the edge. First, it leaves deeper scratches that are more difficult to remove/smooth for a good edge. Pushing down hard drives the abrasives on the stone into the metal of the edge resulting in overly aggressive scratch patterns. These tend to be difficult to completely remove and result in a ragged edge. Second, it creates an overly elastic burr. A burr is the thin line of steel created at the apex of the edge that is removed with final honing and stropping to leave behind a crisp apex. When you apply too much pressure it will create a large burr that maintains some of the elasticity of the steel, causing it to flip back and forth from one side of the edge to the other incessantly. This is, for me, the most frustrating thing to deal with when freehand sharpening, but it’s my own fault for getting hasty and applying the excess pressure.

So, how much is the right amount? I have a general rule that I use; if the knuckle of the finger that is on the blade, keeping it stable, is white from applying pressure then it’s definitely too much. Now, that’s certainly not an exact measure and can vary person to person, but it’s an easy way to remind yourself that you might be applying too much pressure. In even more general terms, you should probably go as light as your patience and confidence allow.

Grit

The last key to successful freehand sharpening is a logical progression through grits. This is one that some people might disagree with me on, but I’ve found it to be important for me in my sharpening. The grit of a stone is the size (and sometimes distribution) of the abrasive particles. These can be stone, diamond, or ceramics as well as polishing compounds. Whatever kind of sharpening material you use, it’s important that you start with a lower grit and move progressively up to the highest grit.

The reason it is important to move gradually in progressive steps of grit, rather than just going from a very low grit to a very high one, is because it facilitates a more even scratch pattern and a more smooth edge apex. Without an even scratch pattern and smooth apex, an edge will have too much drag when moving through the material during cutting. This can cause more of a tearing or sawing action than a cut like is achieved with a good edge. All that said, some people prefer a toothy edge. I like a toothy edge sometimes, but I still think a good toothy (and not just jagged) edge requires progression through grits in reasonable steps.

So, what are good grits to use? Well, again, this is somewhat of a wide question. Some people use very low grits like 80 and even 60 on knives, especially if the edge is damaged, but I would save those grits for axes and gardening tools. The lowest I go is 120 grit, but I normally start at 325 grit even for reapexing. I then move up to 600 then a ceramic stone. Ceramics can be difficult to give a grit rating, but it’s probably around 1200. From there I go to a strop with diamond polishing compound, then sometimes I strop lightly on a jeweler’s cloth. As you can see, this shows a pretty much even progression with the grits doubling in each stone change. My system is similar in grit progression to most of the fixed angle systems. For example, the KME system comes with 140, 300, 600, and 1500 grit stones.

All that said, you can still get a more than usable edge with one stone. I’d probably suggest going right down the center with a 600 grit stone, if you’re only going to buy one. The big thing for getting a good edge using only one stone is that you have to focus even more on the first two keys: correct angle and low pressure.

Conclusion

Freehand sharpening can be a very rewarding skill. It allows you to keep your knives sharp with very few tools that can be taken almost anywhere. It also can be a very relaxing practice, almost in a meditative or zen manner. On the other hand, if you fail to follow these keys to successful sharpening it can also be a huge headache! So make sure you practice as much as you can and keep these 3 keys in mind when you do. You’ll be a freehand sharpening champ in no time!

I’m Tying the Knot!

Today I marry a wonderfully good, strong, intelligent, beautiful woman with whom I am proud and blessed to be able to spend my life. I scheduled this (and hopefully some other) post out in advanced, so that I don’t have to fiddle with the website and social media during our wedding and honeymoon.

Not how are wedding is going to go obviously, but too classic and hilarious not to include

My (soon to be) wife had no particular interest in knives before we started spending time together. She was familiar and comfortable with them as someone who grew up on a farm doing outdoors stuff like hunting and fishing, but she didn’t know anyone who was an enthusiast like I am. However, she has been extremely supportive in my enthusiasm for knives. She is a big part of the reason why Knife Thoughts exists. Not only does she respect my taking time and energy to write these articles, film the videos, and make the posts but she even encouraged me to go for it and start the website itself. Over the past few years together she has given me some awesome knives like the Spyderco Ouroboros and Roadie, and the Cold Steel FGX Balisong. I know she hears a lot more about knives than she ever expected, and I know she’s been paying attention because she’s become quite knowledgeable!

All the knives I have with me, out for sharpening

However, she and I both deserve to take time to focus on each other during our wedding and honeymoon. With that in mind, I won’t be posting as much if at all on Instagram, Facebook, Twitter, etc. and will only be posting pre-scheduled articles. If for some strange reason you desperately need to get ahold of Knife Thoughts (extreme, non medical, unable to wait, earth shattering knife emergency?!) I will still have access to email but won’t be checking it regularly.

Something she gave me and something I gave her

Thanks for reading, as always. Knife Thoughts will be back in full force soon!

The Long Awaited Spyderco Native Chief is Here and it’s BIG!

The Spyderco Native Chief is a knife I’ve been waiting to get my hands on for a long time. I first dipped my toes into the world of knife enthusiasm in earnest when I found BladeForums looking for a longer version of the old FRN Spyderco Native. I had been given one and, although I do like the normal sized Native (especially the updated Native 5), I thought that a longer version would be a superior knife. In my head first dive into the rabbit hole that is online knife forums, I eventually found a picture of the Spyderco Native Chief prototype from 1999. There were whispers across the knife community that it was coming, but no one knew when. Then, without warning, this year Spyderco announced that the Native Chief would finally be released; the knife that was promised had come after 20 years!

The Native Chief with a couple other long slender knives, the Camillus made Remington Guide and Great Eastern Cutlery made Northfield Ben Hogan (top to bottom)

This article will give you my thoughts on the Spyderco Native Chief. My experience with this knife is facilitated by Rivers Edge Cutlery. Rivers Edge Cutlery recently started a knife pass-around program, wherein they select a group of knife enthusiasts to try out a knife for about a week then send it along to the next person on the list. I was very excited to see that the Native Chief was the first knife in the program, and jumped on the opportunity to get try out this knife. I really appreciate Rivers Edge Cutlery giving me the chance. I took full advantage of my time with the knife, and will provide a thorough and honest Knife Thoughts review of the Spyderco Native Chief.

The fabled Spyderco Native Chief prototype from 1999. Notice the swedged blade with a hollow grind, more like the older FRN Native. The production Native Chief that came to fruition in 2019 has a full flat grind and handle shape more like the Native 5. This image is not mine, I claim to ownership of it. It was found at this Spyderco forum thread.

Materials

The Native Chief has pretty standard materials for a U.S. made Spyderco. The handle is made of linerless black g10. The g10 has a fairly grippy texture, which lands pretty close to the center of Spyderco’s g10 when it comes to texture aggressiveness. The handle feels solid with no flex, despite the lack of liners. In my experience using knives, liners are more of an aesthetic thing than a structural necessity. I’ve used several linerless g10 and FRN handled Spydercos in what most would consider “hard use” with no issues. The blade is CPM S30V. CPM S30V is still a really good steel, and one that Spyderco certainly knows how to correctly heat treat to bring out its highest qualities. Some people might claim that a knife in this price range should have an even more modern steel, as there is a contingent of knife enthusiasts who see CPM S30V as less than current and not a super steel. I personally have used Spyderco’s CPM S30V a lot and am very happy with its mix of edge holding, sharpenability, stain resistance, and toughness (probably, roughly, in that order). It will hold an edge longer than VG10 or 154CM, is more stainless than AUS8 and 8CR13MOV, and won’t chip as easily and is less difficult to sharpen than things like CPM S110V and the like. On this knife in my use, slicing up vegetables for salads and cutting (a whole lot of) cardboard, the steel performed extremely well and more than what I consider a value for this knife’s price. However, I do find it strange that Spyderco went with CPM S30V, like on the older model Natives, rather than CPM S35VN, like on the Native 5. They made the Native Chief’s design more like that of the Native 5, so I don’t know why they wouldn’t go with the Native 5’s steel. I guess that’s a question for Sal!

The Native Chief sitting victoriously on a pile of cardboard it vanquished at work

Specifications

The Native Chief is not a small knife. It boasts a 4.08″ blade and a 5.08″ handle. Despite the 50/50 choil, this long blade makes for a solid cutting edge of 3.58″. In comparison to something like the PM2, this makes for a slightly better edge length to handle length ratio, meaning the Native Chief fits more usable blade into the handle. The blade is .125″ thick, with a full flat grind and distal taper. This means that the blade grind thins both from the spine down to the edge and from the handle toward the tip, making for a thin edge and pointy tip. Despite its ample length, the Native Chief weighs in under 4oz. The main thing to glean from the Native Chief’s specifications is that it packs a respectable blade and edge length considering its handle size and weight.

The Native Chief, Native 5, and GEC Tidioute #15 TC Barlow for size comparison

Design

By design, the Native Chief is an elongated Spyderco native 5. If you place the Native 5 on top of the Native Chief they line up perfectly for most of the design, the blade is just more gently curved toward on the edge and spine and the handle is continued on the same line. With an inch longer blade, the Native Chief has a long and slender blade somewhere between a spear point (like the older versions of the Native) and a leaf shape. It has some straight edge near the handle then a long gentle curve, pretty close to equal between the spine and edge, toward a very acute point. This blade shape has lent itself noticeably well to kitchen tasks. Some people scoff at using a folding knife for food prep, but it any pocket knife is cut out for it it’s the Native Chief. With a nice thinly ground blade, it slices as easily through peppers, tomatoes, and other food stuffs as it does through cardboard. Now, some people have commented on the thinness of the tip on the Native Chief. Admittedly, it does have a quite fine tip due to the distal taper. I do think that for the majority of knife users the tip is fine enough that you’ll be more likely to break the tip than on the average modern knife in this price range. However, this thin tip also allows for more precise cutting and piercing. So, although it might take some more mindful use, I do think when used correctly the tip should not be an issue.

A spectrum of peppers sliced with the Native Chief

Like the other knives in the Native family, it has a 50/50 finger choil. This means that a scallop is formed for the index finger half with the handle and half with the blade. On the Native 5 the main grip area, without the finger choil, is just short of providing a full 4 finger grip for me. On the other hand, the Native Chief’s main grip area is more than ample for a solid 4 finger grip with room to spare. I like the finger choil especially on a longer knife like this because it allows you to choke up on the blade and have more precise control for finer cutting tasks. I find the handle to be extremely ergonomic overall, and comfortable in all kinds of grips (pinch, hammer, reverse, etc.). I do find the sculpting on both sides of the handle help to orient my index finger in a normal pinch or hammer grip.

When the Native 5 is placed on top of the Native Chief it’s easy to see that the Native Chief is an elongated Native 5

The blade is opened, of course, by a Spyder hole. The opening hole on the Native Chief is the same size as that on the Native 5. It certainly works fine, and I don’t think it could be much bigger considering that the blade is not taller on the Native Chief than on the Native 5. The opening is smooth and consistent using the normal thumb opening, and it can easily be middle finger flicked and Spyder dropped. However, I have trouble getting enough purchase to flick the blade open, without using my wrist, using my thumb. I think this is in part due to my thick thumb, and also due to the fact that without a thumb ramp the Native Chief’s Spyder hole sits partially obscured by the handle.

The Native Chief’s blade is locked open and self closed by the classic Spyderco mid-lock. This lock is just an upgraded back lock and its simplicity, reliability, and ease of use make it one of my most favorite lock types. The mid-lock holds the blade open with absolutely no play in any direction and also pulls the blade closed once unlocked. This means you don’t have to worry about the knife closing in use, or opening accidentally when not in use.

A Spyder in the vines

Finally, the Native Chief has a 4 way reversible pocket clip. The clip itself is pretty standard for a U.S. made Spyderco. I tried both tip down and tip up right hand carry, and I have to say that I’m not sure which I prefer. Sometimes on knives as large as the Native Chief I prefer tip down, especially on flippers. Being such a long knife, whichever way you carry it you will have to do some adjusting in your hand when you pull it out of your pocket in order to open it. The good thing is you have both, or rather all 4, options available to you so that you can carry the Native Chief however you like.

Build

The Native Chief is built very similarly to other U.S. made Spyderco knives. It has screw construction and is fully disassemblable. As a pass-around knife mind came to me not brand new and somewhat broken in, but this example has very smooth action. Like I mentioned, it’s not the most easily flickable knife but that’s due to the nature of the mid-lock (it always applies pressure to the tang of the blade during opening/closing) more than the quality of the build. It is easy to open and close one handed with the Spyder hole and has consistent pressure throughout. It locks with no blade play whatsoever, and feels extremely secure in its open state. This knife seems to want to stay a little off center toward the pile, or clip (for right hand carry), side but it’s not rubbing the liners and hasn’t seemed to worsen in the time I’ve had it (see the companion YouTube video to see the exact centering). The blade seems to be ground quite well, both even and consistent. The edge came to me quite sharp even after someone else having and using it for a week, and it just took a few passes on my strop to bring it back to extreme sharpness. The edge also seems pretty even, and the angle seems set thin for aggressive slicing. Overall it’s a very well built knife, as is expected from a top line Spyderco.

Conclusion

The Native Chief is a knife I, and many other knife enthusiasts, have been waiting to see come to fruition for years; it doesn’t disappoint. It is exactly what I hoped it would be, simply an elongated version of Spyderco’s classic Native pattern. It provides more handle for a better grip and more blade for a wider range of suitable cutting tasks. Although the point is probably fragile in comparison to modern knives of more “tactical” or “hard use” designs and the opening hole could be more easily accessed if bigger, these minor gripes are far outshadowed by the good things the Native Chief brings to the table. In my time with this knife I have used it for food prep, opening and breaking down boxes, work usage (cutting paper, opening letters, cutting tape, etc.), and general EDC / every day carry type uses and it has taken everything in stride without breaking a sweat. Considering this is a large made in the U.S.A. knife with high quality materials and build, I think a price tag of ~$160 makes it a good value in today’s modern knife market. I hope to put the Native Chief into my permanent collection at some point, and if you’d like to also you can find it at Rivers Edge Cutlery by following this link. Tell them I sent you!

Rivers Edge Cutlery was generous enough to include me in this pass-around and share some stickers!

P.s. When Spyderco announced the Native Chief they also announced the Emphasis (linked here). I see the Emphasis as a budget version of the Native Chief. Due to their similarities, I hoped to write an article comparing the two. However, I might have to do a separate article on the Emphasis alone. Either way, if you like the general design of this knife but don’t care as much about the lock type or high end materials, and would prefer a more budget friendly price point, keep your eyes peeled for a review of the Emphasis (hopefully) in the future.

A Note on Honesty, Negativity, and Enthusiasm in Knife Thoughts

I was just showing off the Spyderco Native Chief that I’m testing as part of a passaround facilitated by Rivers Edge Cutlery and a point came up that I wanted to address.

I realize that my articles often seem to shed an unrealistically positive light on the knives in question. I know that I rarely totally denounce a knife as a failure, and even often give counter arguments when I point out a negative characteristic of a knife.

There are a couple reasons for this tendency:

First, I generally know that I’ll like a knife before I buy it. What I mean by that is not that I’ve never been disappointed by the build quality of a knife or liked a feature less than I expected, but that I spend a lot of time (probably too much) researching and deliberating on what knives I want. This naturally weeds out most knives that would be likely to garner a truly negative review, because I know if there have been reports of quality issues and the like well before purchasing a knife.

Second, I am usually thoroughly excited to get a new knife and that can put a rosy tint on my perception of it. Being that I am a knife enthusiast through and through, getting almost any knife amounts to an overall good experience. Of course there are exceptions, but I generally find something to be happy with on a knife simply because I enjoy knives.

However, I try first and foremost not to allow my view of a knife and especially my published thoughts on a knife to be influenced by the manufacturer’s, dealer’s, owner’s, or general population’s expectations. I mean to give fully honest reviews based solely on my genuine feelings and experiences of the knife.

Authenticity is one of the core values of Knife Thoughts and I intend to ensure it remains a pillar of my writing and posting.

Why the L.T. Wright GNS Tactical knife is a great traditional fixed blade with tactical features

This article will tell you why the L.T. Wright GNS Tactical is a great knife that brings together some traditional and some tactical elements. The knife was donated by L. T. Wright Knives as a prize for the winner of the main event match at the Stout Fights Pro Grappling show this past weekend. Therefore, this will also be somewhat of a crossover article for me, as I refereed at the show. Being a prize knife I didn’t get to use or carry it, so unlike my other articles my thoughts here will be based mostly on first impressions. However, I do have experience with L.T. Wright knives so I think I can give a fair, honest, and full review (as always!).

Mike Wilkins, the winner of the main event at Stout Fights Pro Grappling SuperFights 2019, with his prize knife after the event.

Materials and Specifications

The GNS Tactical package actually includes two pieces, a “live” knife and a “trainer”, both with different materials. The live knife has a full tang blade of O1 tool steel, OD Green micarta handle scales, brass and steel handle rivets, and a leather sheath. O1 tool steel is a well liked and widely used steel for outdoors fixed blades. It is not stainless and not a super steel when it come to edge holding / wear resistance, but it is easy to sharpen and pretty tough. OD green micarta is a pretty classic choice for an outdoors or tactical knife, as it is low key but provides good grippiness even when wet. The trainer knife seems to have an aluminum blade, orange g10 handles, and aluminum pins. Many trainer knives are made with aluminum, although in this case there are some burrs that I would definitely file off before using the knife for training, as they could easily leave small cuts. The orange g10 is quite strikingly visible, which is a good thing both to differentiate if from the live knife and to help to see the knife in training. Both knives have a ~4.45″ blade and ~5.1″ handle. The live knife weighs about 8.5 ounces. With those specs, it would be considered a medium sized fixed blade by most. It’s big enough to get most tasks done, without being unweildy to carry or use. This knife, like all L.T. Wright knives, is built by hand in Ohio. Overall the GNS Tactical’s materials and specs are pretty standard for either a tactical or traditional knife.

Design

The GNS Tactical is very similar to many outdoor fixed blades. It has a blade shaped somewhere between a drop point and a spear point, similar to a Kephart style knife. It has a simple and comfortable handle with a slight palm swell, small guard, and small upturn at the butt. However, there are some small tweaks that push it more toward the tactical end of the spectrum. First, there is an added swedge near the tip. This swedge makes the tip pointier and better at piercing. Second, the handle has aggressive scallop texturing that make for a much grippier purchase than on the typical traditional fixed blade handle (even in the same material). Beyond those two modifications, it’s very similar to the normal L.T. Wright GNS, which is a pretty standard outdoor fixed blade design. The sheath is the same sheath that comes with several L.T. Wright knives. It is a classic vertical belt carry sheath. It can either be carried low, using the d-ring dangler loop, or higher with the built in loop. I think that, for a tactical knife, the built in higher carry belt loop would be the better choice because it would be kept in place better and would be easier to conceal. The sheath also has a firesteel loop, which is basically a holdover from the more outdoors focused knives in the L.T. Wright lineup. I was thinking that one might be able to put a flashlight in the firesteel loop, but it’d have to be a thinner flashlight than any I’ve seen. Still, even if the firesteel loop is redundant in the tactical usage of the knife, it doesn’t really seem like it’d get in the way. Overall, the GNS Tactical is a really classically designed knife with a few added tactical features.

Build

L.T. Wright built this knife simply, but very well. The blade is saber ground, meaning it isn’t ground all the way to the spine. Sometimes this kind of grind can be left too thick for my liking. For example, my Blind Horse Knives Woodsman Pro has a saber grind and didn’t cut as well as I’d like, so I had it reground by Razor Edge Knives. However, although I didn’t get to use this knife, this GNS Tactical looked to be ground quite well for good cutting performance. The swedge is also evenly ground. To be honest, the blade grind on this knife looks significantly better than the one that my older Woodsman Pro came with (more on why it’s a relevant comparison later). The handles are held on by steel pins peened into brass tubes and also glued, so they have both mechanical and chemical attachment. This double attachment makes for a sturdy handle. The handles on this knife have been sculpted in a way that I really enjoy. It’s what I’d call a scalloped finish across the entire handle, over top of an already sculpted handle. These finishes together make for a handle that feels great, with no hotspots, but also feels like it would be easy to hold onto even if it were wet or cold. The sheath is extremely well put together. In my experience, it’s clear as soon as you first look it over whether a leather sheath is high or low quality. This one seems built to last, with solid rivets/snaps and thick stitching on good strong feeling leather. As a whole, this knife exudes quality and a readiness to be put to use.

Conclusion

This L.T. Wright GNS Tactical is a nice knife. It has a classic design that has been slightly modified for more tactical secondary features, and it is built extremely well. I do wish that it came with a sheath made more specifically for tactical type carry. Also, the trainer knife was far too pointy for use in the type of training I’m familiar with, as it could easily puncture and cause serious injury when grappling (beyond that, it was well made, and it could easily be ground down to be more safe). However, don’t let two small gripes make you think I don’t like this knife set. In fact, I think the GNS Tactical is a great knife whether you want an outdoors (hunting, fishing, bushcraft, etc.) or tactical (self defense, combat, etc.) fixed blade. I can tell you how it feels great in the hand, has a practical design, and classic materials but the best testimonial comes from the new owner of the knife. Mike Wilkins, who won the knife at the Stout Fights Pro Grappling Superfights, is not a knife enthusiast. In fact, I don’t think he’s ever owned more than a Victorinox Classic. However, after having the L.T. Wright GNS Tactical for a few days Mike said he really likes it, can tell it’s really well made, and he’s looking forward to using it! If you’re looking for a very practical medium sized fixed blade with a flare for the tactical, this might be a good option. You can find a list of authorized dealers at this link.

The full L.T. Wright GNS Tactical Package